Showing posts with label multicultural. Show all posts

Friday, June 19, 2015

End of the year: 5th grade

And now, some of my 5th graders work from the end of the school year. These are simple 9x12 weavings embellished with hand-drawn hieroglyphics. The highlight are the Egyptian drawings - inspired by several color copy handouts I gave the kids to observe from. They really enjoyed the challenge of this figure drawing assignment as you can see in the examples. Pencil first, sharpie to make it all pop and then colored pencil. 


And to end out the year, we made some jewelry using the Kumihimo weaving technique. Kumihimo was invented by Japanese fishermen to braid rope. It means "gathered threads." The kids went cuckoo for this - I even did!! It's so fun and EASY! I have to say it was pretty magical. I taught myself how to do it from the Dabbles and Babbles blog before showing the kids. To make the loom, the kids cut out a circle from mat board, which can be a little heavy for them, so I was on guard to help. We traced around yogurt lids. After they drew and cut the dashed lines around the perimeter for the slits, I used a box cutter to draw an X in the center, then poked a very thick pencil through to form the hole. Sometimes the looms just get "tired" after making a bracelet or necklace (even when made from something thicker like the mat board), so have some extra board on hand because your kids will want to make more than one!

Tuesday, June 16, 2015

End of the year: 4th grade


These Greek column compositions turned out super groovy - I just love them! The backgrounds were created using an experimental printmaking technique using plastic bags! I really love the juxtaposition of classical vs. experimental. I suggested that students stick to about 3 colors of paint on the day we made the printed papers so things wouldn't get too muddy. On the second day of work, we looked at some handouts I made on Greek architecture, specifically columns. The kids picked one of the orders that they liked best and set about creating a drawing of a column using the visuals to help them. I left the drawing portion very open ended: pencil and/or sharpie, close up view/far away view, one column or several.....you get the idea. I even let them choose what color of paper to work on! I was very impressed and will continue to teach this assignment. 


Ahhhhhhh, yes......on to the ORIGAMI!! I know most teachers would typically shy away from teaching anything using origami techniques, but I have been teaching the kids how to build this cube for several years now and have built up my courage! It isn't for the faint of heart, especially when you have 20+ hungry-for-origami eyes staring at you, but they love it! There is usually some heartache and torment during the first day, but once they get over that hurdle, the sky is the limit! I taught myself how to do it quite a while ago and you can too! This is the link that started it all for me......Origami Mommy
I would suggest only working on the folds for Day #1 and the assembly on Day #2. After I have taught the kids the folds, I tell them that I am not going to give them any instruction, but they may play around with the pieces and experiment until the time is up. Some kids don't want to do this - and I don't push it. Regardless, we store our pieces in large mailing envelopes for the next class period. Inevitably, there is always one child who figures it out on Day #1 without my help - and that child becomes an assistant for Day #2 and makes your life much easier! The process of a student helping their peers always leads to confidence building and of course, you gain more assistants in the process because more children are able to finish a cube vs. if you as the teacher are the only one who can help. Trust me, the first few years I taught this there were tears and many disgruntled kids, but I learned through experience how to break it down :) 


Monday, June 15, 2015

End of the year: 3rd grade

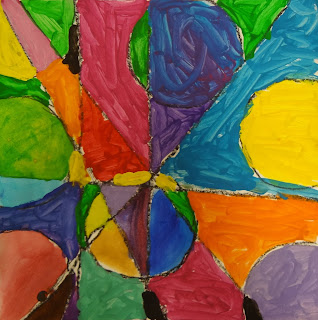
3rd graders worked on a 12x12 geometric painting during the last few weeks of school. I still needed to cover tints and shades and found this a perfect way to do so. Plus, it really worked well in getting the kids to focus and discover color mixing since we were still in testing mode. I found it to be therapeutic for them to work this way, plus they had fun mixing and making as many colors as possible! Students traced about 7 shapes from my box of teacher-made shape tracers (Did I mention before how much I love peanut butter lids for circles? They are perfect!). Then I asked them to dissect the paper using a ruler from one edge to another, at any angle, about three times. All pencil lines were traced with black crayon and off they went to paint! I kept six large egg cartons stocked with paint (one for each table) inside a Tupperware lidded container over the weeks so I didn't have to keep preparing them from scratch. That was a nice trick I discovered and will continue to use. Students used pieces of white scrap paper for their palettes. 


A couple of groups had some extra time, so we talked about Aboriginal art and how it's based on circles and dots which fit right in with our geometric theme. I made a handout of Aboriginal art so they could view many, examples. The kids were given those same egg cartons full of paint and a piece of 12x18 paper and asked to paint about 5 small dots scattered onto the surface and then build them out to "pack" the paper. I gave a demonstration and showed a variety of ways to build the painting, making sure to emphasize that my way is never the only way. It was really neat to see the kids get into a thinking trance as they worked!


Friday, June 12, 2015

End of the year: 2nd grade

2nd grade spent several weeks exploring the country of China during our multicultural art making and learning unit. We made Chinese lanterns in celebration of the lantern festival, origami paper necklaces (which actually turned into gifts for Mother's Day), and one class even had time to make a dragon mask! See below:

The lantern lesson was inspired by Deep Space Sparkle 

Paper necklaces are so easy and fun to make, but it does take some prep on the part of the teacher prior to class. See this post from last year for the scoop and give it a try! 

The masks were inspired by a really striking illustration I found via Pinterest. I broke down the drawing into simple lines and shapes as we worked on red construction paper. Then the kids traced their work using sharpie and colored using construction paper crayons. As students finished cutting out their dragon face, they brought it to me and I used masking tape to attach a thick kraft stick to the back. To reinforce the entire mask so it would stand upright without flopping forward, I taped down a large paper plate on top of the stick and then cut off any pieces of the plate that were poking out. The kids were really excited about these! 

Thursday, June 11, 2015

End of the year: 1st grade


1st graders wrapped up the school year by studying the country of India and learning about the painted elephant festival. To begin, I made a handout of painted elephants to get the kids excited. After viewing that and talking together, I taught them how to draw an elephant in profile view and when they were done adding details, they traced everything in sharpie, added crayon if desired and then painted the elephant's gray skin. On day two, students painted a 12x18 piece of paper in warm or cool colors and created a stamp using a piece of 4x4 matboard and some craft foam. Students were asked to glue down at least 5 shapes to the matboard to make the stamp -the shapes could be organic and/or geometric as long as they were not glued on top of one another. On the third day, students painted black tempera onto their stamp to add a border of prints on top of the warm or cool painting. Then the kids cut out their elephant and brought their papers to me. I helped them assemble everything since we were short on time and then I sprinkled on the sequins as a finishing touch. Next year, I will make the entire project half the size 9x12 or omit the stamping part. I was biting off a little more than I could chew with this one, but they did turn out lovely.

For the last 2 periods of art class, we made watermelon illustrations which were so much fun! I guess you could say we went wacky for watermelon! We talked about placement, overlapping, rhythm, repetition and emphasis in this lesson. I love seeing the kids draw fruits - so this is a theme I will definitely revisit! I had to laugh when I saw some kids going way above and beyond the amount I asked them to draw. I think one student snuck in 40-something slices of watermelon - talk about setting the bar high. Haha.


Friday, May 15, 2015

Kindergarten Koi Fish Ponds

This was an adorable lesson to work on with Kindergarten.The kids learned that koi fish originate from Japan and can be a symbol for good luck and friendship.
On day one, students drew concentric circles to simulate a ripple using white oil pastel onto 12x12 turquoise construction paper. Then they painted the paper with blue tempera cakes and plenty of water for a resist effect.
On day two, students used black crayon on orange construction paper to draw a koi fish using simple lines and shapes. Little wiggles were added on top of the fish to create scales. The final component was a lily pad - we even looked at some of Claude Monet's water lily paintings and observed the beautiful flowers that sometimes grow on lily pads!


P.S. The inspiration for this art piece came from a blog post I found via Pinterest.....however, the blog is no longer in existence.

Thursday, April 30, 2015

4th grade Mexico Unit


4th graders wrapped up their unit on Mexico a few weeks ago. We made ceramic clay suns, Mexican folk art mirrors and even practiced drawing some Mexican Indian designs. The clay lesson is a winner and I've taught it for several years now. I figured out the secret to controlling the size of the sun is to limit the space during the planning phase, so I hand out a planning sheet with a circle that they draw sun rays around. I added a square around that circle so they have to stay within that space (you don't want those rays to get too long or skinny). It truly helps. I allow my students to show any emotion they would like and we look at a handout I made with lots of ceramic suns to generate ideas. During the time when we are waiting for the suns to be fired, students designed a folk art mirror (inspiration from Painted Paper). I bought silver wrapping paper for them to use for the shiny center. While the mirrors were being designed students who finished early took a look at some Mexican Indian designs and used them as a starting point to create a drawn composition.